
News
2026 How to Choose the Best COB LED Strip Light?
Choosing a COB LED strip light in 2026 is not just a search for the brightest tape. The right choice depends on where it will sit, how its light should look, and whether its driver matches the installation. COB strips can create a more continuous-looking line than widely spaced LED packages, but performance still varies by product. Check the actual specification sheet.
Energy efficiency matters, too. The U.S. Department of Energy’s LED Lighting page reports that LEDs use at least 75% less energy and last up to 25 times longer than incandescent lighting. That comparison is useful context, not a guarantee for every strip or installation. A poorly matched power supply, inadequate heat management, or unsuitable dimmer can undermine a promising setup.
Start with the details you can verify: measured lumens per meter, watts per meter, color temperature, and CRI. Then confirm strip width, voltage, maximum run length, cut points, and the power supply’s required output. A high CRI number alone does not settle it. For a kitchen task area, color consistency may matter more than dramatic brightness; for a display shelf, dimming behavior and visible reflections may matter more. Small details count.
Check the environment rating against the real location, especially near sinks or outdoors. Also review thermal guidance and test a short sample before committing to a long run. Product labels are not always easy to compare, and specifications can leave questions unanswered. That is worth admitting. This guide explains how to weigh the evidence and choose a COB LED strip light for dependable, practical illumination.
Understanding COB LED Strip Lights and How They Work
COB means “chip on board.” Many small LED dies sit closely together on a circuit board, beneath a shared phosphor coating. Their overlapping light forms a nearly continuous line, unlike the visible points common on some conventional strips. Not magic. The board still needs a suitable power supply and a path to release heat. In a warm room or enclosed channel, poor heat management can shorten service life and shift color.
The U.S. Department of Energy’s Energy Saver guidance says LED products use at least 75% less energy than incandescent lighting; this broad comparison is not specific to COB strips. For product-life claims, look for test documentation. IES LM-80 measures lumen maintenance for LED packages, modules, or light engines; TM-21 uses those results to project maintenance over time. A projection is not a guarantee for the complete strip. Check the test conditions, operating temperature, and whether the stated figures apply to the strip or only its LED components. A diffuser can soften the glow further, but it may also reduce brightness. That trade-off is easy to overlook.

Defining Your Lighting Needs and Installation Environment
The right COB LED strip starts with the job, not the package. Will it light a kitchen counter, a display shelf, or a hallway edge? Each task calls for different brightness and color. Warm white can feel comfortable in living spaces, while neutral white may show food and work surfaces more clearly. Check a sample at night; showroom lighting can be misleading.
Measure every run, including corners and the path back to the power supply. A common planning mistake is choosing a strip before checking where its driver and wiring can fit. Long runs may show uneven brightness, so check the strip’s voltage and recommended maximum run length. Confirm that the driver matches the strip’s voltage and total wattage, with some capacity left over. If dimming matters, verify compatibility before buying. Measure twice.
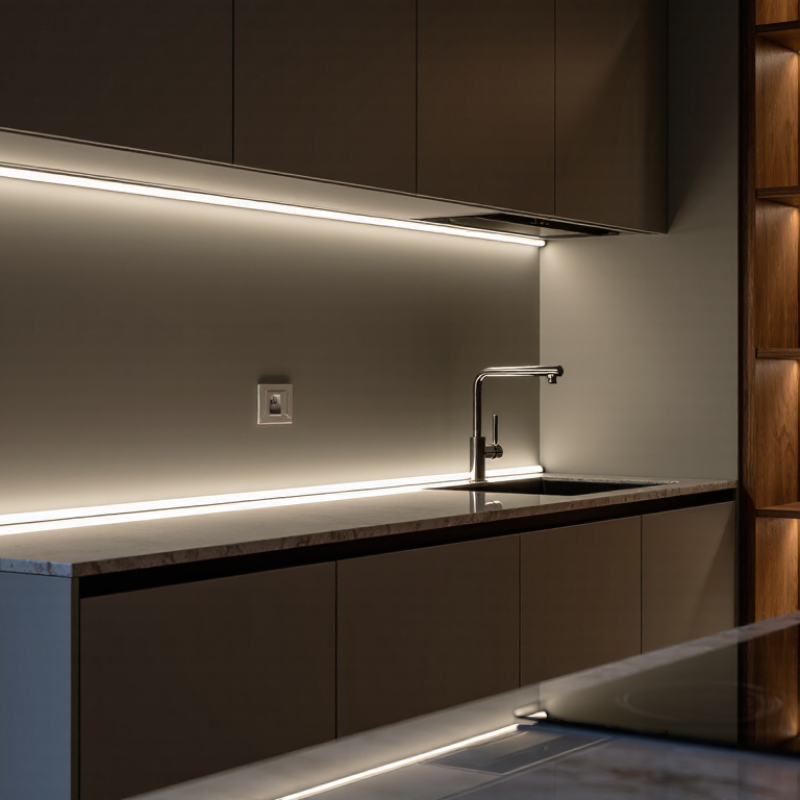
The installation area matters just as much. A dry bedroom and a steamy bathroom need different levels of moisture protection; check the product’s IP rating against the actual exposure. For a kitchen, keep the strip clear of direct heat and splashes. An aluminum channel can help manage heat and protect the LEDs, while a diffuser softens reflections on glossy counters. Not every surface is perfectly straight. Test a short section first, especially under cabinets, where a slight gap can be surprisingly visible.
| Lighting Need or Location | Recommended Light Quality | Practical Strip Specification | Installation Environment | Planning and Installation Checks |
|---|---|---|---|---|
| Kitchen counters and task lighting | Choose a suitable white color temperature, commonly 3000K–4000K. A CRI of 90 or higher can help food and surface colors look more natural. | Consider a dimmable 24V COB strip with continuous-looking light and output matched to the required brightness. Check the product’s stated lumens per meter and watts per meter. | For a dry, indoor installation, IP20 is generally suitable when the strip is protected from water and grease. | Install in an aluminum channel to help dissipate heat and protect the strip. Keep it away from direct water exposure; use an appropriate splash-resistant product where needed. |
| Living rooms, shelves, and accent lighting | Warm white around 2700K–3000K is often selected for a relaxed atmosphere. Dimming helps adjust brightness for different activities. | Choose a strip with a compatible dimmer and power supply. Select output based on whether the light is decorative, indirect, or intended to illuminate a surface. | IP20 is typically adequate for dry indoor areas. | Check that the strip, dimmer, and power supply use compatible voltage and control methods. Conceal the strip from direct view if glare is a concern. |
| Bathrooms and other damp indoor areas | Select color temperature and brightness according to the task and the room’s existing lighting. | Use a strip and connection system with an ingress-protection rating appropriate to the specific location. Sealed products may be harder to cut or reconnect than uncoated strips. | IP-rated protection must suit exposure. Requirements can vary by bathroom zone and local electrical regulations. | Do not assume a strip’s rating applies to cut ends, connectors, or power supplies. Follow the product instructions and local electrical code; use a qualified installer where required. |
| Outdoor eaves, covered patios, and exterior features | Choose a color temperature that suits the intended appearance and check that the strip’s output is adequate for the viewing distance. | Select a product specifically rated for outdoor use, with compatible sealed connectors and an outdoor-suitable power supply. | Consider rain, humidity, dust, temperature changes, and possible UV exposure. The required IP rating depends on the actual exposure and installation details. | Protect connections and cut ends as specified by the manufacturer. Provide drainage where appropriate and avoid placing a sealed strip in a location that traps heat. |
| Display cabinets and close-up feature lighting | For accurate color appearance, look for a CRI of 90 or higher. Select CCT to complement the displayed objects and surrounding finishes. | COB construction can provide a more continuous line of light than widely spaced visible LED packages, especially when viewed close up. | Dry indoor conditions generally suit IP20 products, provided they are protected from contact and physical damage. | Check the strip width against the channel and available cabinet space. Test for glare, reflections, and color appearance before installing the full run. |
| Long, continuous runs along coves or ceilings | Choose CCT and brightness for the room’s intended use; consistent specifications across the full run help maintain a uniform appearance. | 24V strips are commonly used for longer runs than comparable 12V strips, but the permitted run length depends on the specific product and installation. | Match the protection rating to the area. Indoor coves are often dry locations, but concealed spaces may still accumulate heat. | Observe the manufacturer’s maximum run length. For longer installations, plan power-feed points to limit voltage drop and brightness variation; use correctly sized wiring. |
| Small projects, short runs, and compact installations | Choose output and CCT for the task; avoid selecting by watts alone because brightness and efficiency vary by product. | 12V or 24V may be suitable. Confirm the strip’s voltage before selecting a power supply, controller, or connector. | Use the appropriate rating for dry, damp, or exposed conditions. | Cut only at the marked cut points. Confirm polarity and connector compatibility, and leave access to the power supply for maintenance. |
| Installations where heat management matters | Set brightness to the required level rather than running the strip at full output unnecessarily. | Compare the stated watts per meter with the intended channel and mounting surface. Higher-power strips generally require more careful thermal planning. | Enclosed spaces and warm environments can reduce heat dissipation and may affect product life. | Use an aluminum channel when recommended, follow the product’s operating-temperature limits, and do not cover the strip with insulation unless the product is approved for that use. |
Selection note: Compare the actual product datasheet for lumens per meter, watts per meter, CRI, CCT, cut intervals, maximum run length, operating temperature, and ingress-protection details. Choose a power supply with the correct voltage and adequate capacity for the total connected load, following its manufacturer’s sizing guidance.
Comparing Brightness, Color Quality, Power, and Efficiency
COB LED strips create a nearly continuous line of light, but smoothness alone does not tell you how bright a room will feel. Compare lumens per meter, not just chip count or wattage. A strip rated at 1,000 lumens per meter may look dimmer when recessed behind a deep diffuser. Check the intended mounting distance and whether an aluminum channel will cover the LEDs. Small details matter.
Color quality changes how surfaces appear. Look for a high CRI rating, and check the R9 value if you need reds to look natural in food, fabric, or artwork. Choose a color temperature that suits the space: warm white often feels calmer, while neutral white can make work surfaces easier to read. Not quite that simple. A printed specification cannot fully show color consistency, so inspect a sample beside the actual materials and under the room’s usual lighting.
Compare power in watts per meter, then consider light output per watt to judge efficiency. A brighter strip may use more energy without delivering proportionally more useful light. Long runs can also lose brightness toward the far end, especially with unsuitable wiring or a weak power supply. Match the supply voltage and capacity to the strip, and allow for heat management. Efficiency figures are useful, but installation conditions can shift real results. Check them before buying.
Checking Strip Width, Cutting Points, Dimming, and Compatibility
How to Choose the Best COB LED Strip Light?
Checking Strip Width, Cutting Points, Dimming, and Compatibility
Check the strip’s width before ordering. A 10 mm strip may not fit a narrow aluminum channel, especially with its diffuser installed. Measure the channel’s inner width, not just the outer edge. Then locate the printed cutting marks. Cutting between them can break a circuit segment, leaving part of the strip dark. A small offcut test can reveal how cleanly the strip handles corners and soldering. It is easy to overlook this detail.
Tips: Match the power supply voltage to the strip’s rating. Confirm the dimmer supports the strip’s control method, such as PWM, and check its minimum load. A quick bench test helps catch flicker before installation.
Compatibility also depends on more than voltage. Check the strip’s wattage per meter, total run length, and the power supply’s usable capacity. Long runs can show uneven brightness, so plan power feeds according to the product’s installation guidance. For dimming, avoid assuming that any wall dimmer will work; controller and power-supply combinations vary. I would still verify the setup with a short sample, because specifications do not always reveal how a dimmer behaves at low brightness. Keep the connections accessible for adjustment.
Selecting a Reliable COB LED Strip and Power Supply
A reliable COB LED strip begins with matching the strip, installation length, and power supply. Check the strip’s rated voltage and watts per meter, then calculate total load: watts per meter multiplied by installed meters. Add about 20% capacity as a practical reserve, rather than running the supply at its limit. For example, a 10-meter, 10-watt-per-meter strip needs 100 watts; a 120-watt supply offers useful headroom. It is not a substitute for checking the manufacturer’s specifications.
The U.S. Department of Energy’s LED lighting guidance reports that LEDs use at least 75% less energy and can last up to 25 times longer than incandescent lighting. These are broad LED comparisons, not a lifespan promise for every COB strip. Heat, poor connections, and an undersized driver can still shorten service life. Look for clear electrical ratings, operating-temperature limits, and documented safety testing. A bright strip can still be a poor choice.
Tips: For a long run, consider 24-volt strips to help reduce voltage drop. Keep the supply ventilated, and check for dimming near the far end after installation. Measure before cutting. One overlooked detail: connectors may add resistance, so soldered joints can be more dependable in demanding installations.